- 西安西 立 电子 员工 培训. Cutting Plotter

Содержание
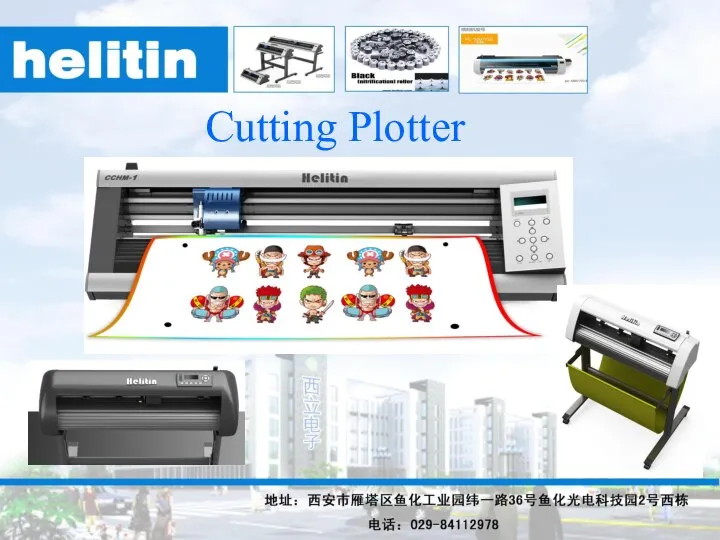
- 2. Cutting Plotter
- 4. Helitin Bell Tech21 CO.,LTD is a Sino-Japan Joint Venture that specializes in research and development, production
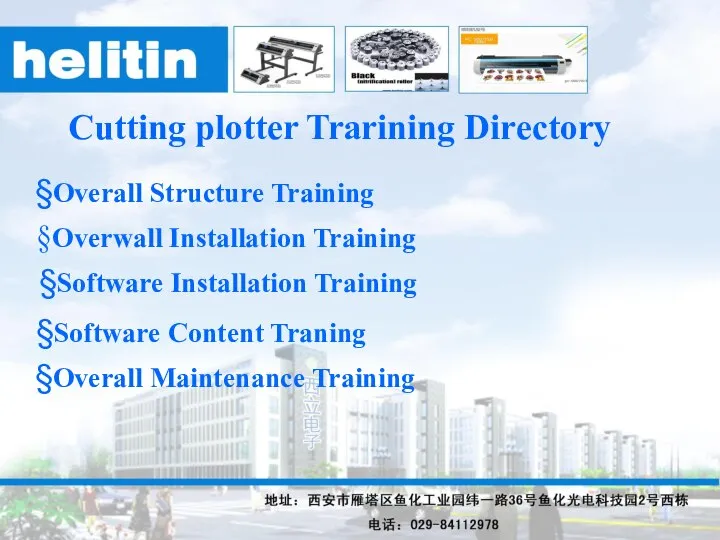
- 5. Cutting plotter Trarining Directory §Overall Structure Training §Overwall Installation Training §Software Installation Training §Software Content Traning
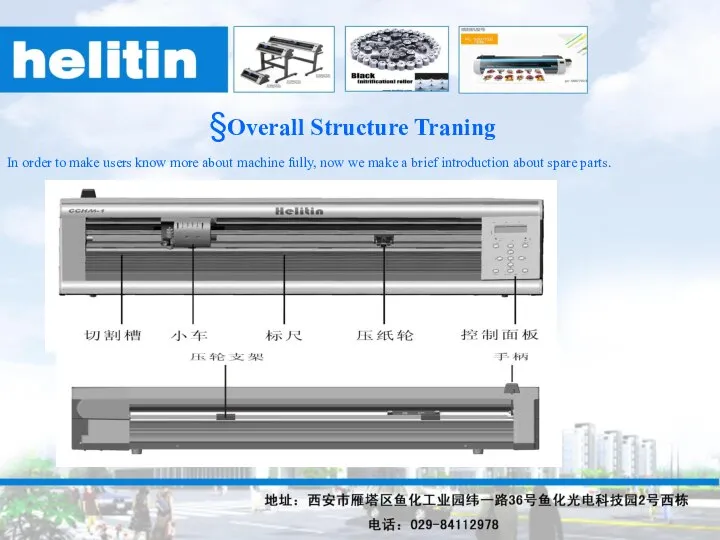
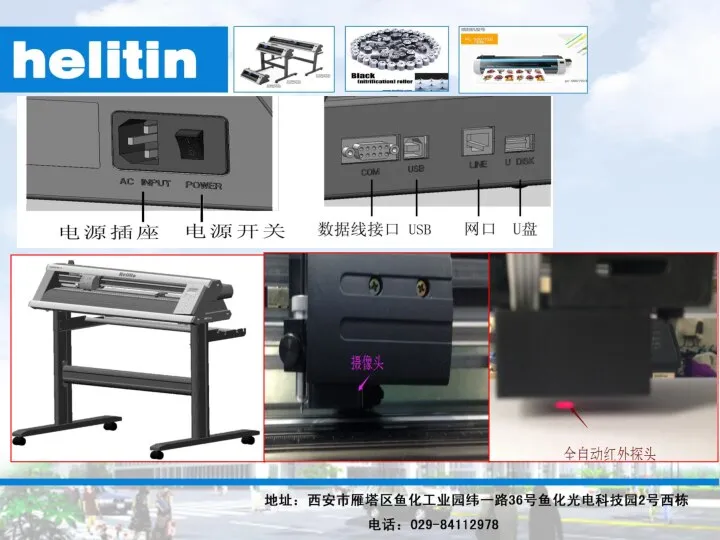
- 6. §Overall Structure Traning In order to make users know more about machine fully, now we make
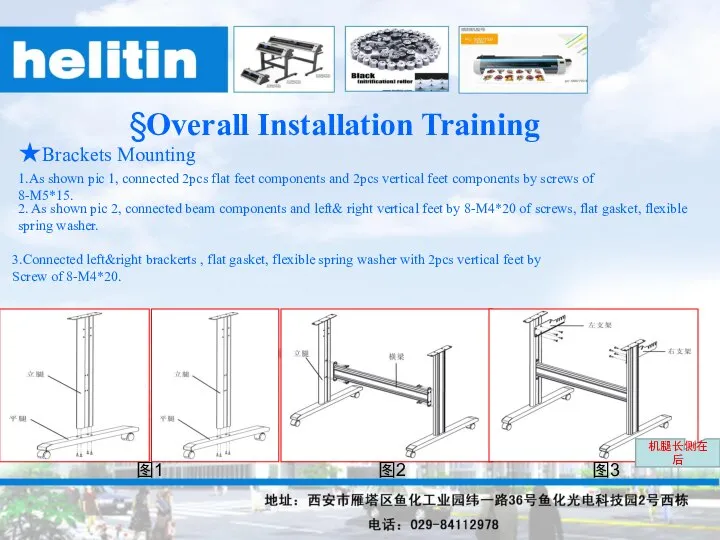
- 8. §Overall Installation Training ★Brackets Mounting 2. As shown pic 2, connected beam components and left& right
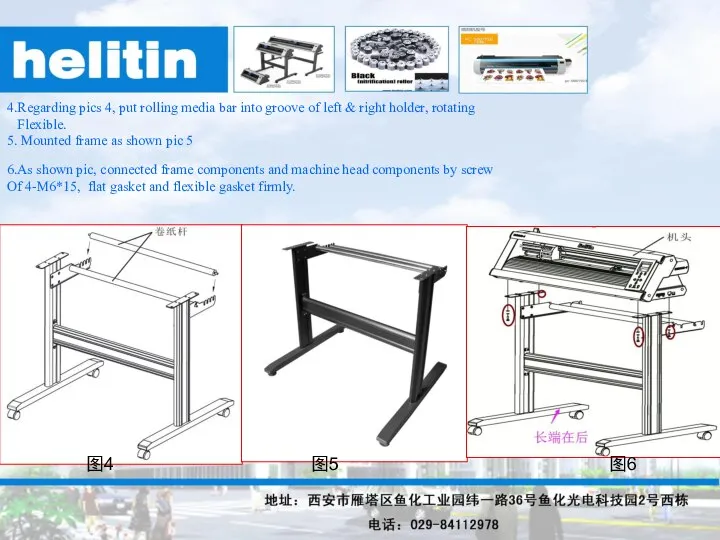
- 9. 4.Regarding pics 4, put rolling media bar into groove of left & right holder, rotating Flexible.
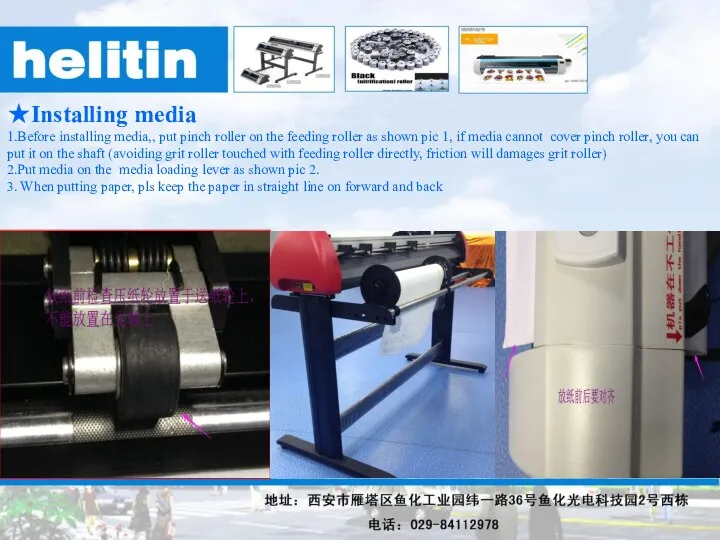
- 10. ★Installing media 1.Before installing media,, put pinch roller on the feeding roller as shown pic 1,
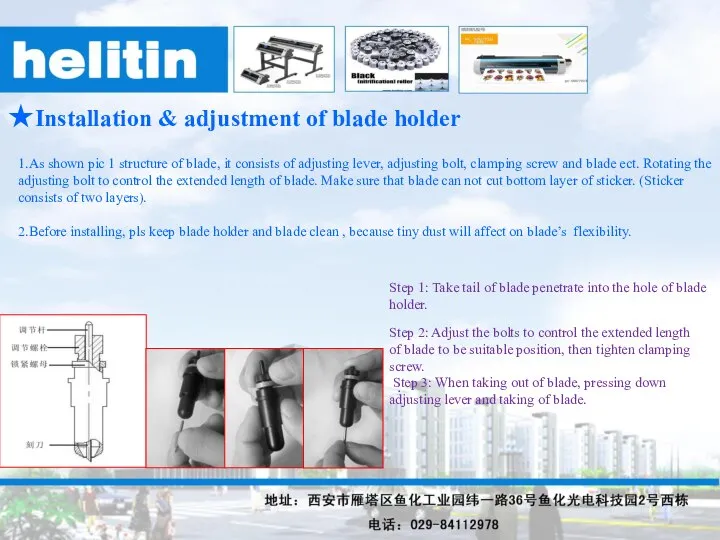
- 11. ★Installation & adjustment of blade holder 1.As shown pic 1 structure of blade, it consists of
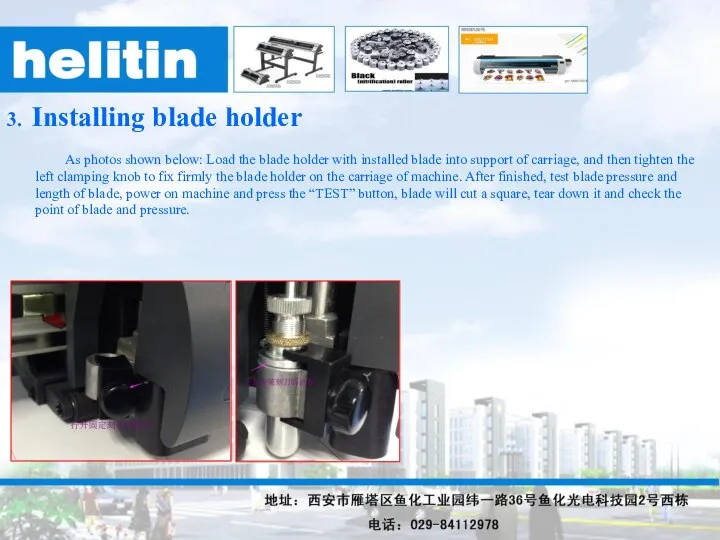
- 12. 3. Installing blade holder As photos shown below: Load the blade holder with installed blade into
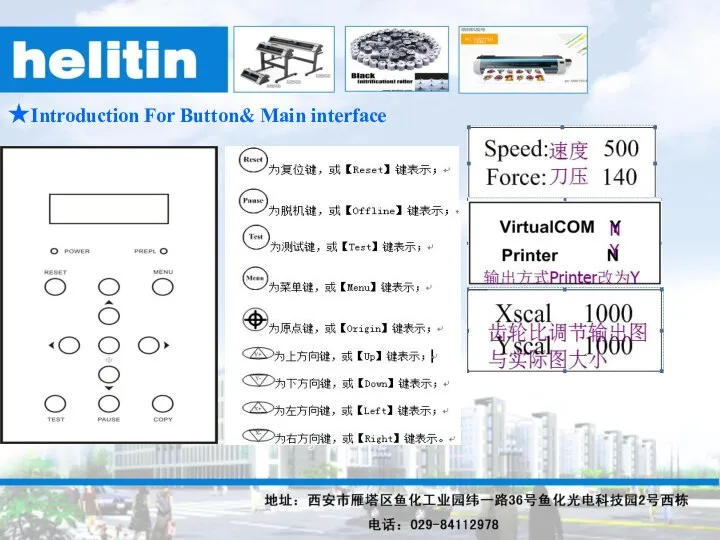
- 13. ★Introduction For Button& Main interface
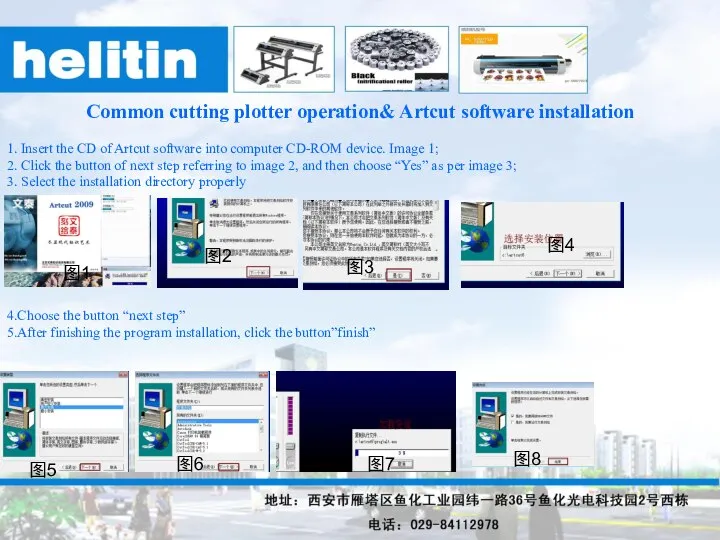
- 14. Common cutting plotter operation& Artcut software installation 1. Insert the CD of Artcut software into computer
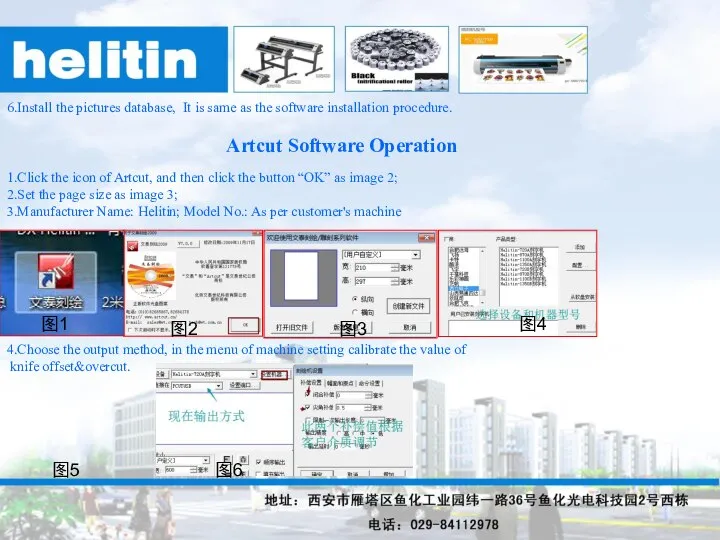
- 15. 6.Install the pictures database, It is same as the software installation procedure. Artcut Software Operation 1.Click
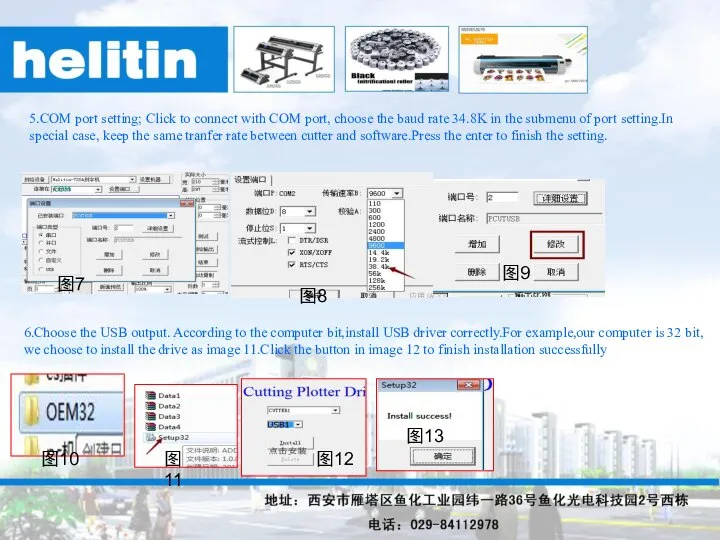
- 16. 5.COM port setting; Click to connect with COM port, choose the baud rate 34.8K in the
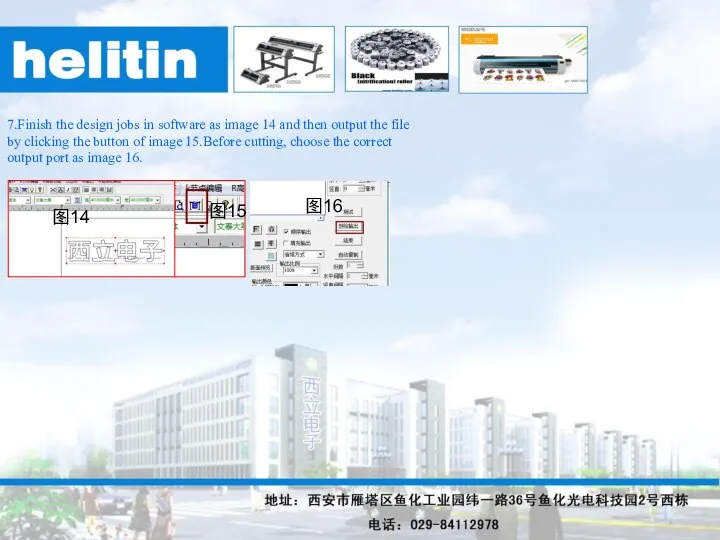
- 17. 7.Finish the design jobs in software as image 14 and then output the file by clicking
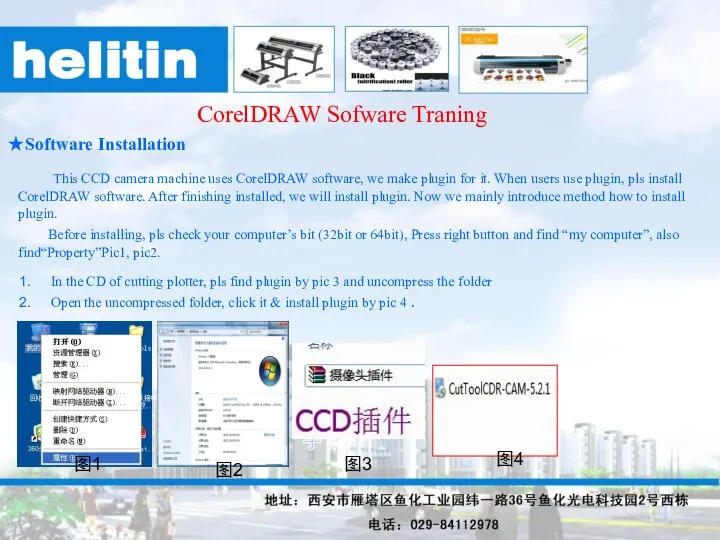
- 18. CorelDRAW Sofware Traning ★Software Installation This CCD camera machine uses CorelDRAW software, we make plugin for
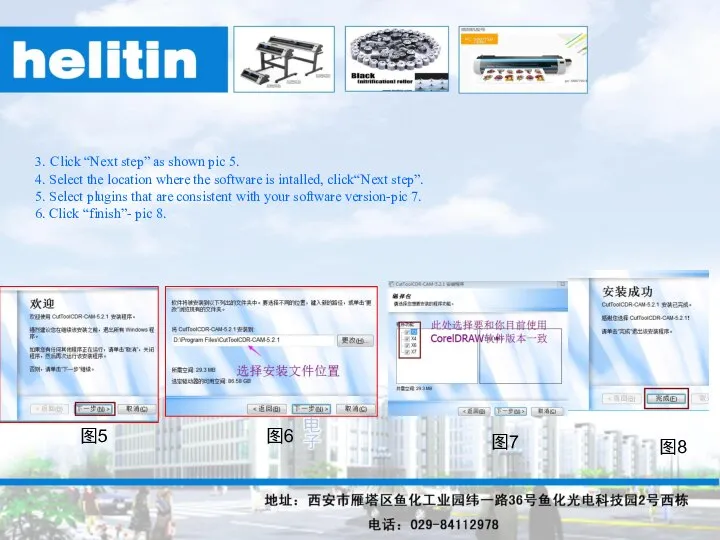
- 19. 3. Click “Next step” as shown pic 5. 4. Select the location where the software is
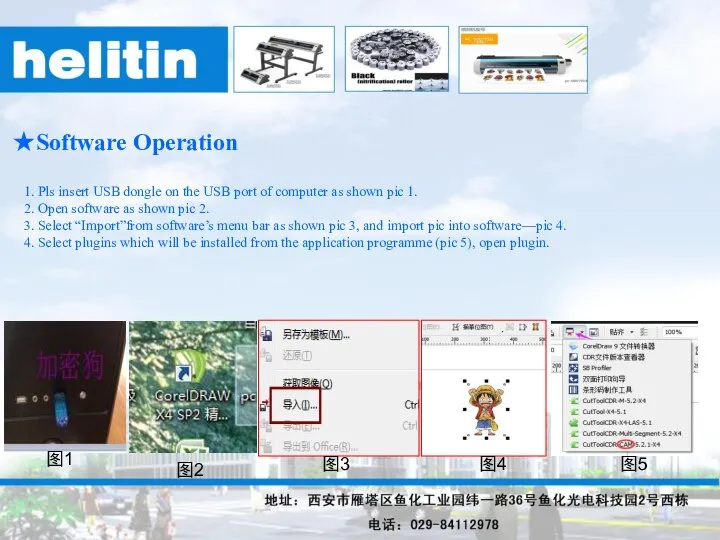
- 20. ★Software Operation 1. Pls insert USB dongle on the USB port of computer as shown pic
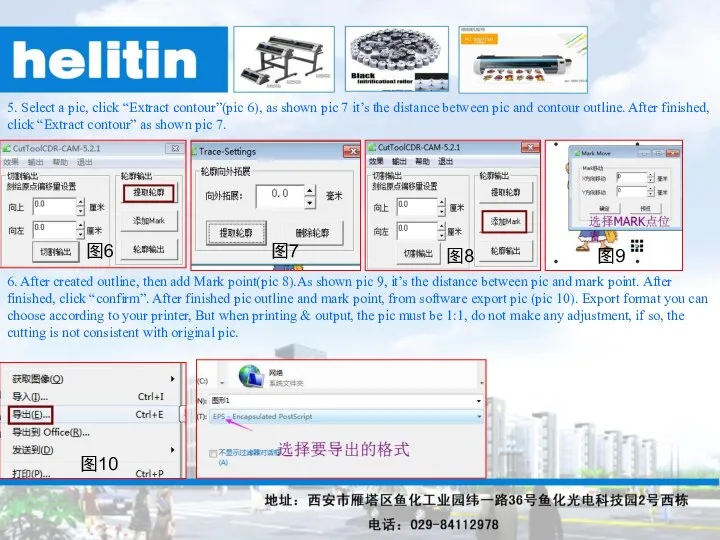
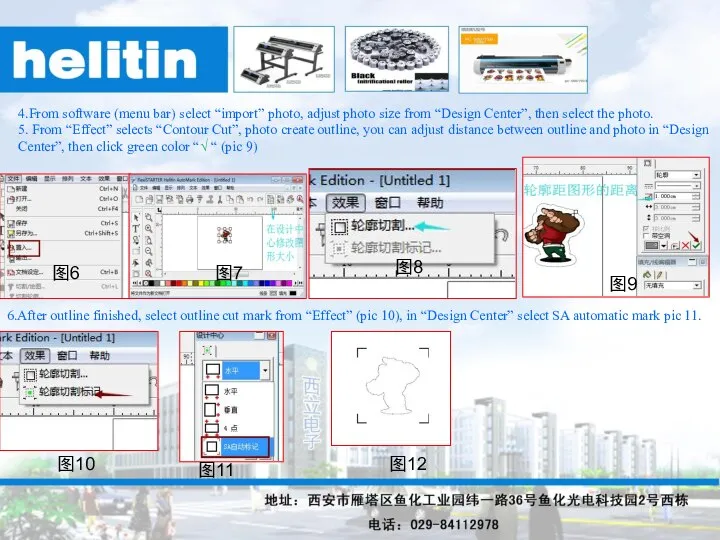
- 21. 5. Select a pic, click “Extract contour”(pic 6), as shown pic 7 it’s the distance between
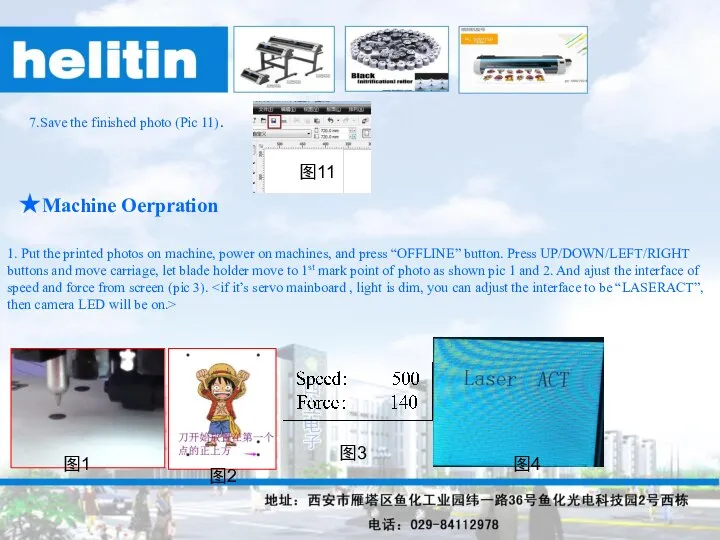
- 22. 7.Save the finished photo (Pic 11). 图11 ★Machine Oerpration 1. Put the printed photos on machine,
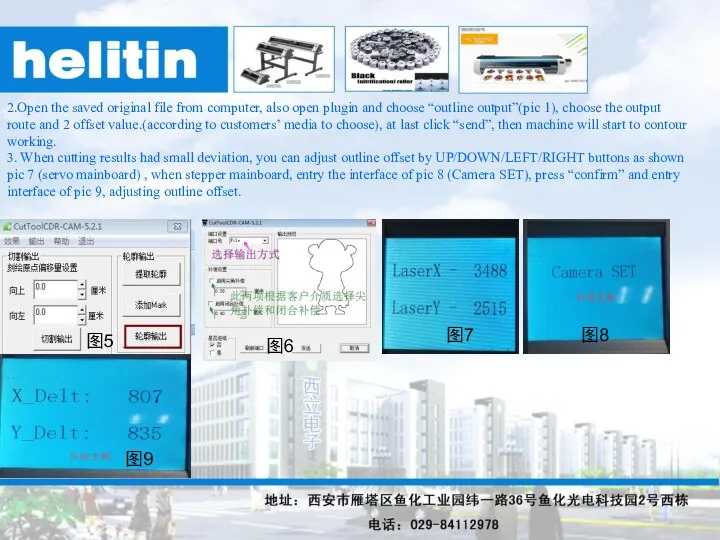
- 23. 2.Open the saved original file from computer, also open plugin and choose “outline output”(pic 1), choose
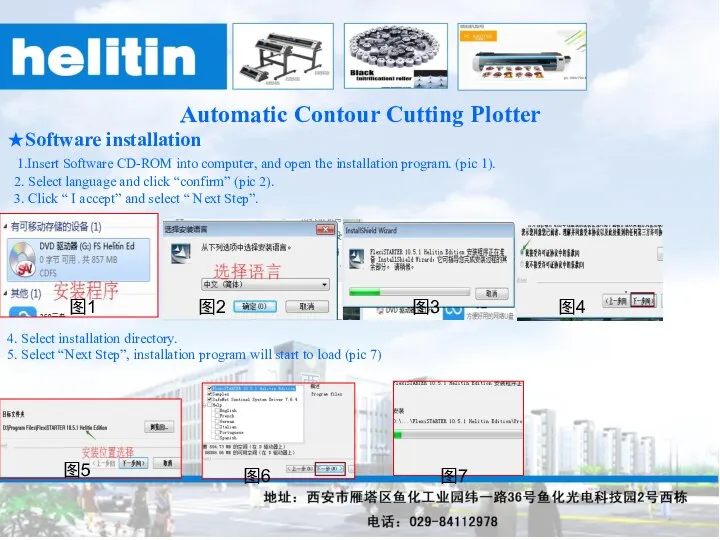
- 24. Automatic Contour Cutting Plotter ★Software installation 1.Insert Software CD-ROM into computer, and open the installation program.
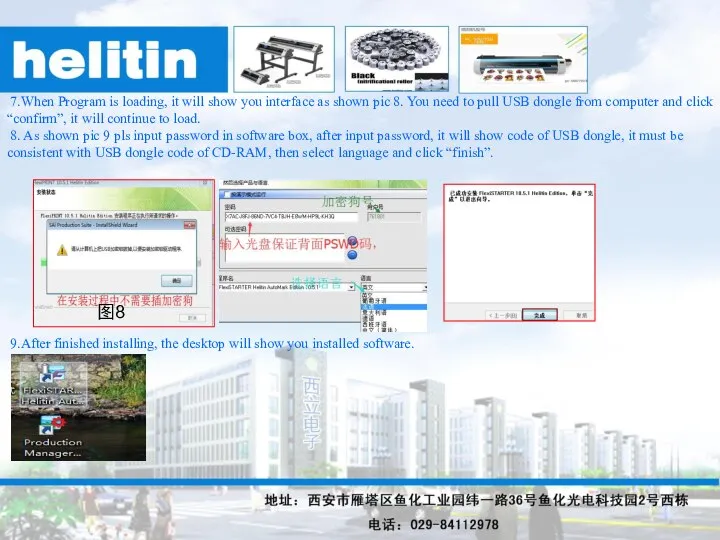
- 25. 7.When Program is loading, it will show you interface as shown pic 8. You need to
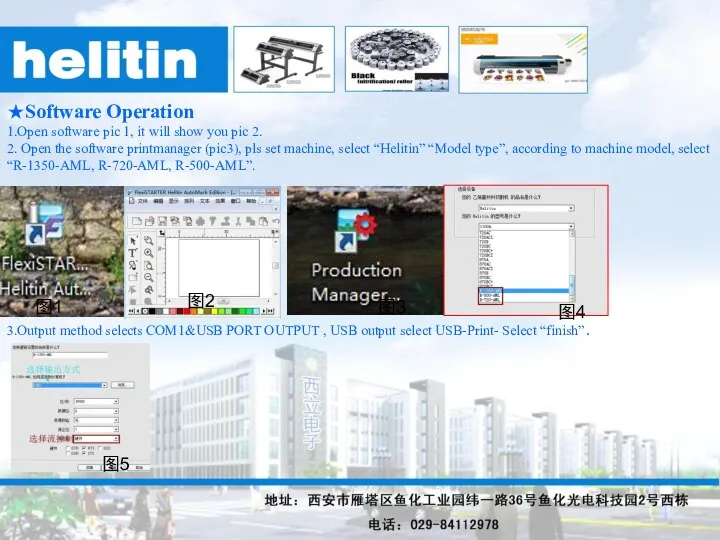
- 26. ★Software Operation 1.Open software pic 1, it will show you pic 2. 2. Open the software
- 27. 4.From software (menu bar) select “import” photo, adjust photo size from “Design Center”, then select the
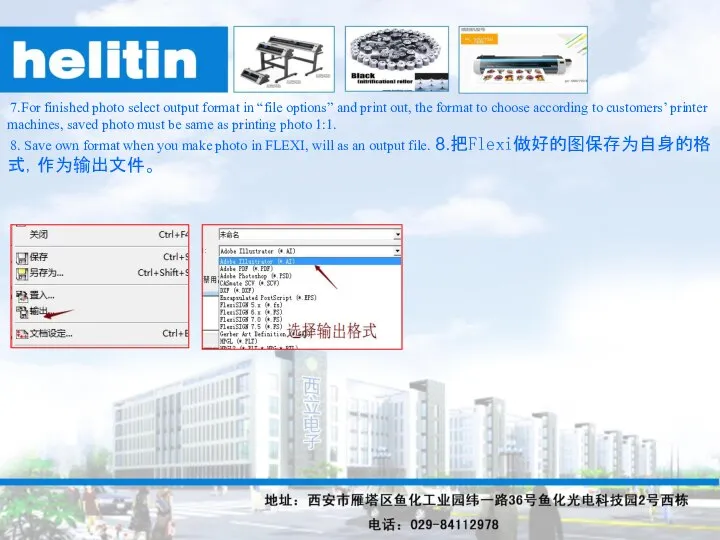
- 28. 7.For finished photo select output format in “file options” and print out, the format to choose
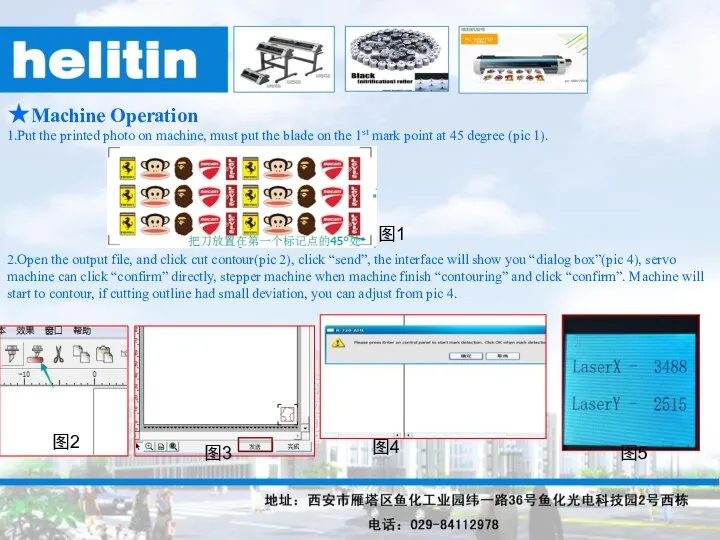
- 29. ★Machine Operation 1.Put the printed photo on machine, must put the blade on the 1st mark
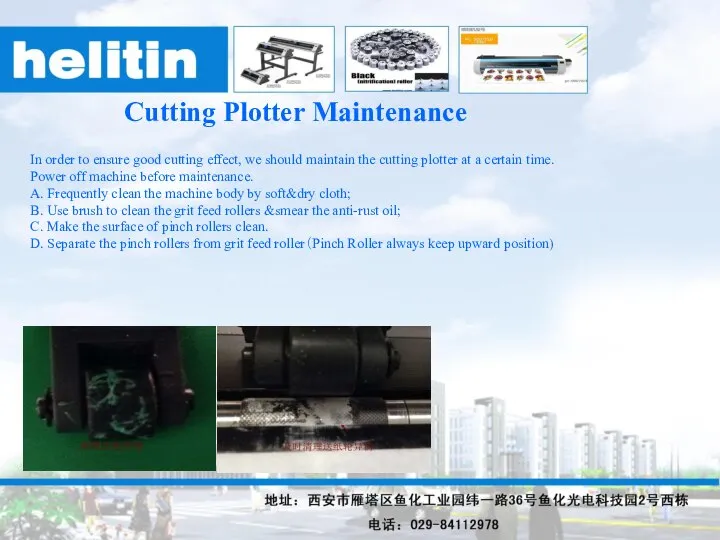
- 30. Cutting Plotter Maintenance In order to ensure good cutting effect, we should maintain the cutting plotter
- 31. 1. Cutting Abnormal If this problem occur, there are several factors need to check : Setting
- 33. Скачать презентацию
Слайд 4 Helitin Bell Tech21 CO.,LTD is a Sino-Japan Joint Venture that specializes
Helitin Bell Tech21 CO.,LTD is a Sino-Japan Joint Venture that specializes

Слайд 5Cutting plotter Trarining Directory
§Overall Structure Training
§Overwall Installation Training
§Software Installation Training
§Software Content
Cutting plotter Trarining Directory
§Overall Structure Training
§Overwall Installation Training
§Software Installation Training
§Software Content
Слайд 6§Overall Structure Traning
In order to make users know more about machine
§Overall Structure Traning
In order to make users know more about machine
Слайд 8§Overall Installation Training
★Brackets Mounting
2. As shown pic 2, connected beam components
§Overall Installation Training
★Brackets Mounting
2. As shown pic 2, connected beam components
Слайд 94.Regarding pics 4, put rolling media bar into groove of left &
4.Regarding pics 4, put rolling media bar into groove of left &
Слайд 10★Installing media
1.Before installing media,, put pinch roller on the feeding roller
★Installing media
1.Before installing media,, put pinch roller on the feeding roller
Слайд 11★Installation & adjustment of blade holder
1.As shown pic 1 structure of
★Installation & adjustment of blade holder
1.As shown pic 1 structure of
Слайд 123. Installing blade holder
As photos shown below: Load the blade holder
3. Installing blade holder
As photos shown below: Load the blade holder
Слайд 13★Introduction For Button& Main interface
★Introduction For Button& Main interface
Слайд 14Common cutting plotter operation& Artcut software installation
1. Insert the CD of Artcut
Common cutting plotter operation& Artcut software installation
1. Insert the CD of Artcut
Слайд 156.Install the pictures database, It is same as the software installation procedure.
Artcut
6.Install the pictures database, It is same as the software installation procedure.
Artcut
Слайд 165.COM port setting; Click to connect with COM port, choose the baud
5.COM port setting; Click to connect with COM port, choose the baud
Слайд 177.Finish the design jobs in software as image 14 and then output
Слайд 18CorelDRAW Sofware Traning
★Software Installation
This CCD camera machine uses CorelDRAW software, we
CorelDRAW Sofware Traning
★Software Installation
This CCD camera machine uses CorelDRAW software, we
Слайд 193. Click “Next step” as shown pic 5.
4. Select the location where
4. Select the location where
Слайд 20★Software Operation
1. Pls insert USB dongle on the USB port of computer
1. Pls insert USB dongle on the USB port of computer
Слайд 215. Select a pic, click “Extract contour”(pic 6), as shown pic 7
5. Select a pic, click “Extract contour”(pic 6), as shown pic 7
Слайд 227.Save the finished photo (Pic 11).
图11
★Machine Oerpration
1. Put the printed photos on
7.Save the finished photo (Pic 11).
图11
★Machine Oerpration
1. Put the printed photos on
Слайд 232.Open the saved original file from computer, also open plugin and choose
2.Open the saved original file from computer, also open plugin and choose
Слайд 24
Automatic Contour Cutting Plotter
★Software installation
1.Insert Software CD-ROM into
Automatic Contour Cutting Plotter
★Software installation
1.Insert Software CD-ROM into
Слайд 25 7.When Program is loading, it will show you interface as shown
7.When Program is loading, it will show you interface as shown
Слайд 26★Software Operation
1.Open software pic 1, it will show you pic 2.
2.
★Software Operation
1.Open software pic 1, it will show you pic 2.
2.
Слайд 274.From software (menu bar) select “import” photo, adjust photo size from “Design
4.From software (menu bar) select “import” photo, adjust photo size from “Design
Слайд 28 7.For finished photo select output format in “file options” and print
7.For finished photo select output format in “file options” and print
Слайд 29★Machine Operation
1.Put the printed photo on machine, must put the blade
★Machine Operation
1.Put the printed photo on machine, must put the blade
Слайд 30Cutting Plotter Maintenance
In order to ensure good cutting effect, we should maintain
Cutting Plotter Maintenance
In order to ensure good cutting effect, we should maintain
Слайд 311. Cutting Abnormal
If this problem occur, there are several factors
1. Cutting Abnormal
If this problem occur, there are several factors

 Презентация на тему Взаимоотношения в семье, описанные в произведениях Л. Н. Толстого
 Миссиология. Семинар по теме 3
 Сибирская хаска
 Презентация на тему История государственных символов России
 Круглый стол «Механизмы и критерии оценки деятельности научного учреждения»
 Ценовые газеты ТС Копейка
 Урок-лабиринт. Древний Крит
 Презентация на тему Сленг
  Проецирование геометрических фигур. Поверхности. Лекция № 3
 Ход лабораторной работы
 Домашняя работа учащихся
 ВЕСЁЛЫЕ ЦИФРЫ
 Разработка локальных актов при введении НСОТ
 Презентация на тему Культура Древнего Китая
  Holidays and customs of Great Britan
 Палитра планеты
 Презентация на тему День снятия блокады города Ленинграда 1944 год
 Коллекции бренда Skechers и история
 Работа с неуспевающими
 Закон бытия
 Проблемно-ориентированный анализ
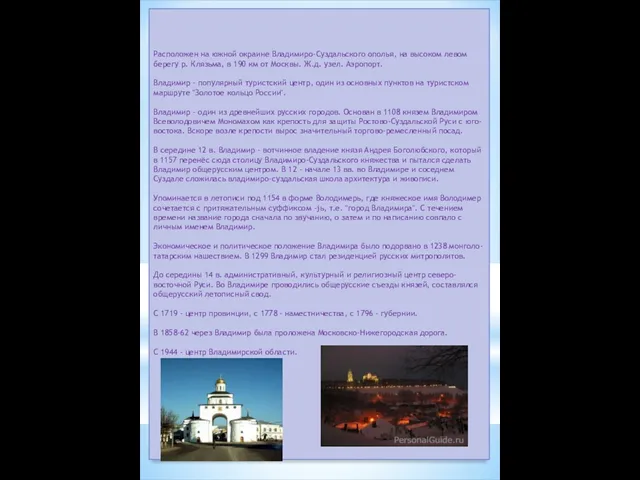 ВЛАДИМИР
 Добро пожаловать в Китай
 Виды, разрезы, сечения, штриховка, выносные элементы на чертежах
 Студия и Агентство – разный бизнес
 Работа в Power Point
 Презентация на тему Осязание
  Экология и экологическая безопасность