- Powering A Smarter World. Cloud Application

Содержание
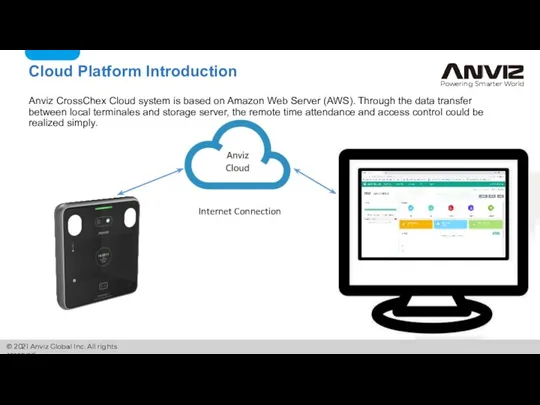
- 2. Cloud Platform Introduction Get best-in-class security, plus smart home automation the whole family will love. Anviz
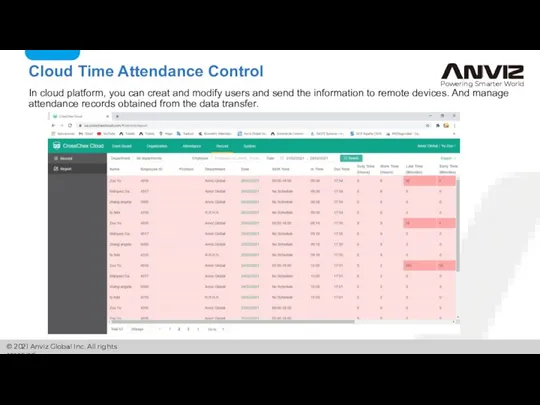
- 3. Cloud Time Attendance Control In cloud platform, you can creat and modify users and send the
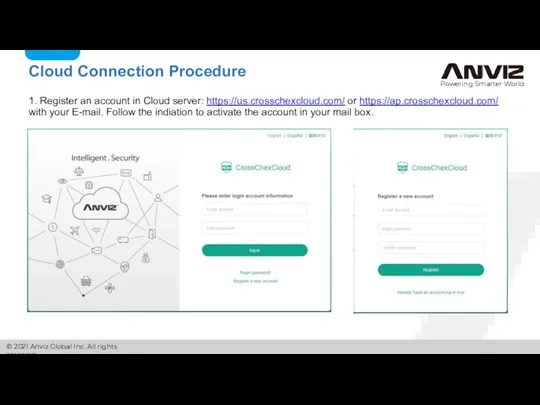
- 4. Get best-in-class security, plus smart home automation the whole family will love. Cloud Connection Procedure 1.
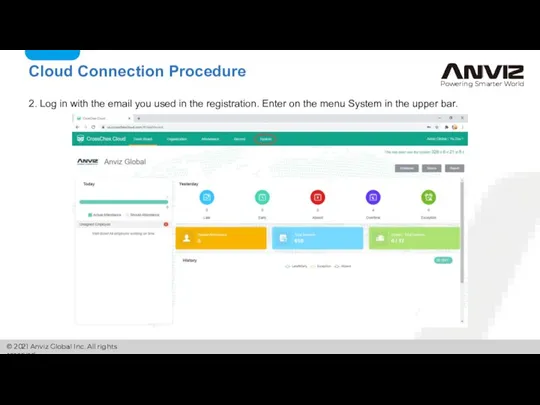
- 5. Get best-in-class security, plus smart home automation the whole family will love. 2. Log in with
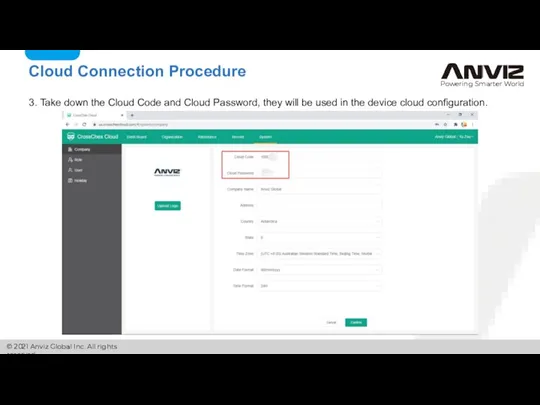
- 6. Cloud Connection Procedure 3. Take down the Cloud Code and Cloud Password, they will be used
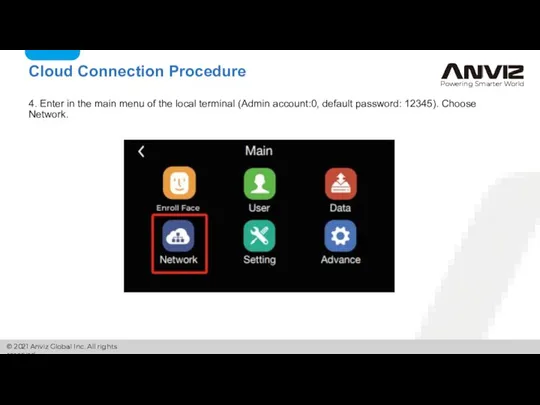
- 7. Get best-in-class security, plus smart home automation the whole family will love. 4. Enter in the
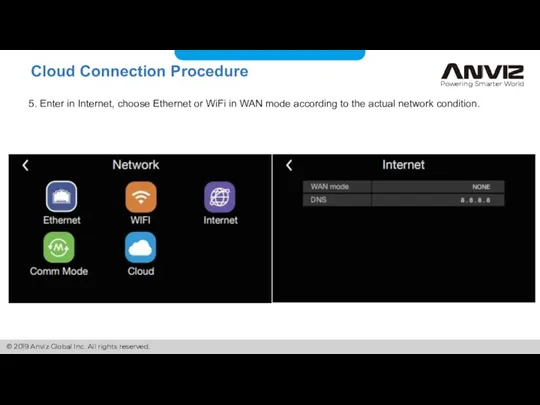
- 8. 5. Enter in Internet, choose Ethernet or WiFi in WAN mode according to the actual network
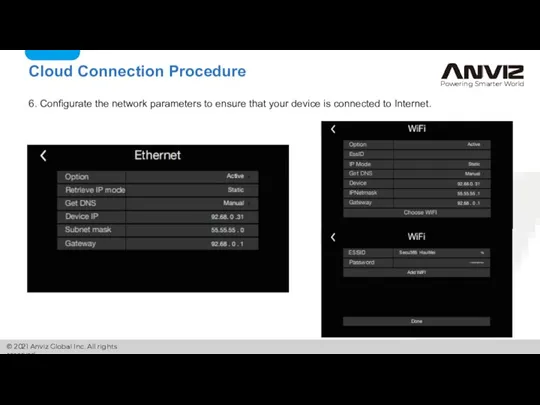
- 9. Get best-in-class security, plus smart home automation the whole family will love. Cloud Connection Procedure 6.
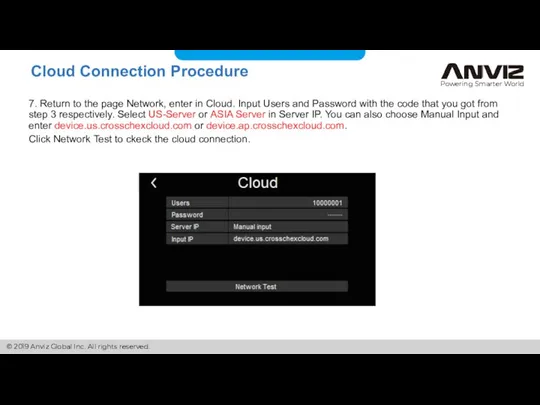
- 10. Cloud Connection Procedure 7. Return to the page Network, enter in Cloud. Input Users and Password
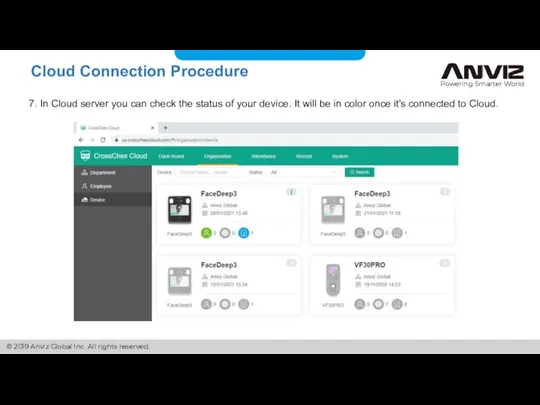
- 11. Cloud Connection Procedure 7. In Cloud server you can check the status of your device. It
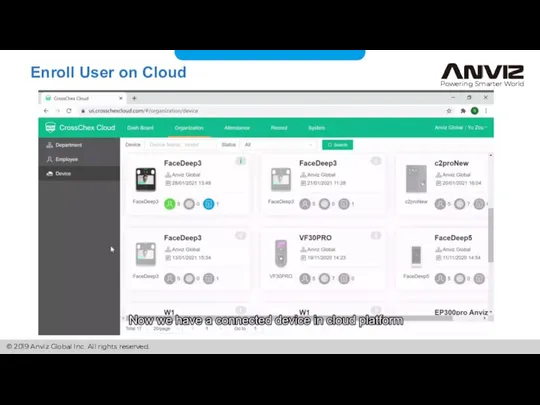
- 12. Enroll User on Cloud
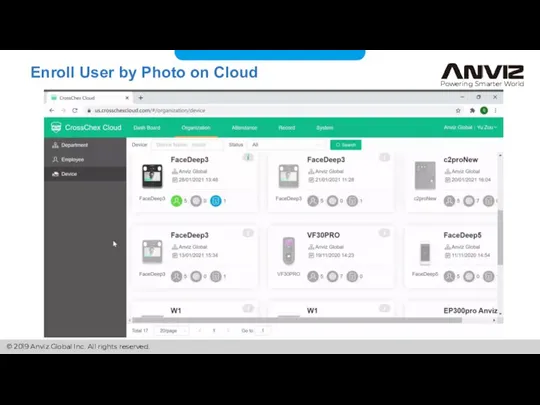
- 13. Enroll User by Photo on Cloud
- 15. Скачать презентацию
Слайд 2Cloud Platform Introduction
Get best-in-class security, plus smart home automation the whole family
Cloud Platform Introduction
Get best-in-class security, plus smart home automation the whole family
Слайд 3Cloud Time Attendance Control
In cloud platform, you can creat and modify
Cloud Time Attendance Control
In cloud platform, you can creat and modify
Слайд 4Get best-in-class security, plus smart home automation the whole family will love.
Cloud
Get best-in-class security, plus smart home automation the whole family will love.
Cloud
Слайд 5Get best-in-class security, plus smart home automation the whole family will love.
2.
Get best-in-class security, plus smart home automation the whole family will love.
2.
Слайд 6Cloud Connection Procedure
3. Take down the Cloud Code and Cloud Password, they
Cloud Connection Procedure
3. Take down the Cloud Code and Cloud Password, they
Слайд 7Get best-in-class security, plus smart home automation the whole family will love.
4.
Get best-in-class security, plus smart home automation the whole family will love.
4.
Слайд 85. Enter in Internet, choose Ethernet or WiFi in WAN mode according
5. Enter in Internet, choose Ethernet or WiFi in WAN mode according
Слайд 9Get best-in-class security, plus smart home automation the whole family will love.
Cloud
Get best-in-class security, plus smart home automation the whole family will love.
Cloud
Слайд 10Cloud Connection Procedure
7. Return to the page Network, enter in Cloud. Input
Cloud Connection Procedure
7. Return to the page Network, enter in Cloud. Input
Слайд 11Cloud Connection Procedure
7. In Cloud server you can check the status of
Cloud Connection Procedure
7. In Cloud server you can check the status of
Слайд 12Enroll User on Cloud
Enroll User on Cloud
Слайд 13Enroll User by Photo on Cloud
Enroll User by Photo on Cloud
 Расшифровка кода пыле- и водозащиты IPxx международного стандарта IEC
 Создание программы для проверки возможности описания окружности вокруг выпуклого четырехугольника
 Implementation of std::common_type
 Интернет технологии
 Помощь в изучении русского языка в интернете. Информационно-справочная система
 О деятельности Администрации города Апатиты в целях создания благоприятных условий для развития малого и среднего
 Художественное моделирование и анимация в программе Blender
 Двумерный массив
 Некоторые понятия, связанные с ЭС и ИИ
 Вимірювання показників якості послуг із доступу до Інтернет. ДВТМ
 Operators panel. Menu handling
 Gimp. Удаление лишних деталей с фотографии. Создание терминатора
 Культурный ландшафт и угрозы журналистике
 Системы счисления
 Обработка информации
 Современное CASE-средство S-Designor фирмы PowerSoft
 Математическое программирование
 Разработка и реализация алгоритма создания и балансировки двоичного дерева поиска со взвешенными узлами
 Интеллектуальная игра Инфознайка
 Виды диаграмм
 Массивы. System. Array
 Программирование и алгоритмизация. Основы программирования. Лекция 4
 Автоматический установщик для компьютеров, ноутбуков Msoft
 Операции на компьютере с фрагментами рисунка
 Центр гигиены и эпидемиологии в Томской области. Разработка веб-приложения
 Быть собой. Postoronka Alina
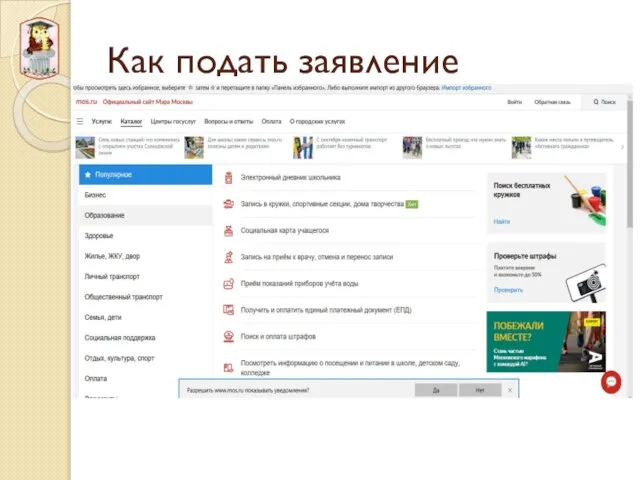 Как подать заявление
 История возникновения систем счисления